The Complete ¥10,000 Sound Booth Plan — Materials, Drawings, Steps and Lessons Learned

Introduction: 100 dB inside, 55–65 dB outside
Let me start with one set of numbers.
When I sing at full voice inside my booth, the sound level is about 100 dB.
Outside the booth, it drops to around 55–65 dB.
These are measurements I took myself.
To my family elsewhere in the house, it sounds like “something is going on.” In other rooms, they say it is faint—quieter than the TV—and not bothersome.
Materials cost roughly ¥10,000–¥15,000. The work took three days total: one day for the drawings, one for shopping, and one for construction.
More important than the numbers was this: I could finally sing at full voice. The vocals I can record now are completely different from what I recorded before building the booth.
📌 What you’ll learn
・How to fit a one-tatami-sized booth into a corner of a six-tatami room
・The materials list and where to put your budget
・A three-day work plan
・How to screw into drywall: what works and what doesn’t, with diagrams
・How I made a heavy plywood-and-soundproofing-sheet door and fitted a gremon handle
・How I wired it so only the mic and headphone lines are wired, with everything else wireless
・My mistakes and what I would change if I built it again
I haven’t included an exterior photo of the booth because it would reveal what my home looks like. Instead, I’ve used diagrams to explain the layout and construction as clearly as I can.
Chapter 1: The finished booth—a one-tatami space in a corner of a six-tatami room
My booth occupies one tatami mat’s worth of space in a corner of my six-tatami room.
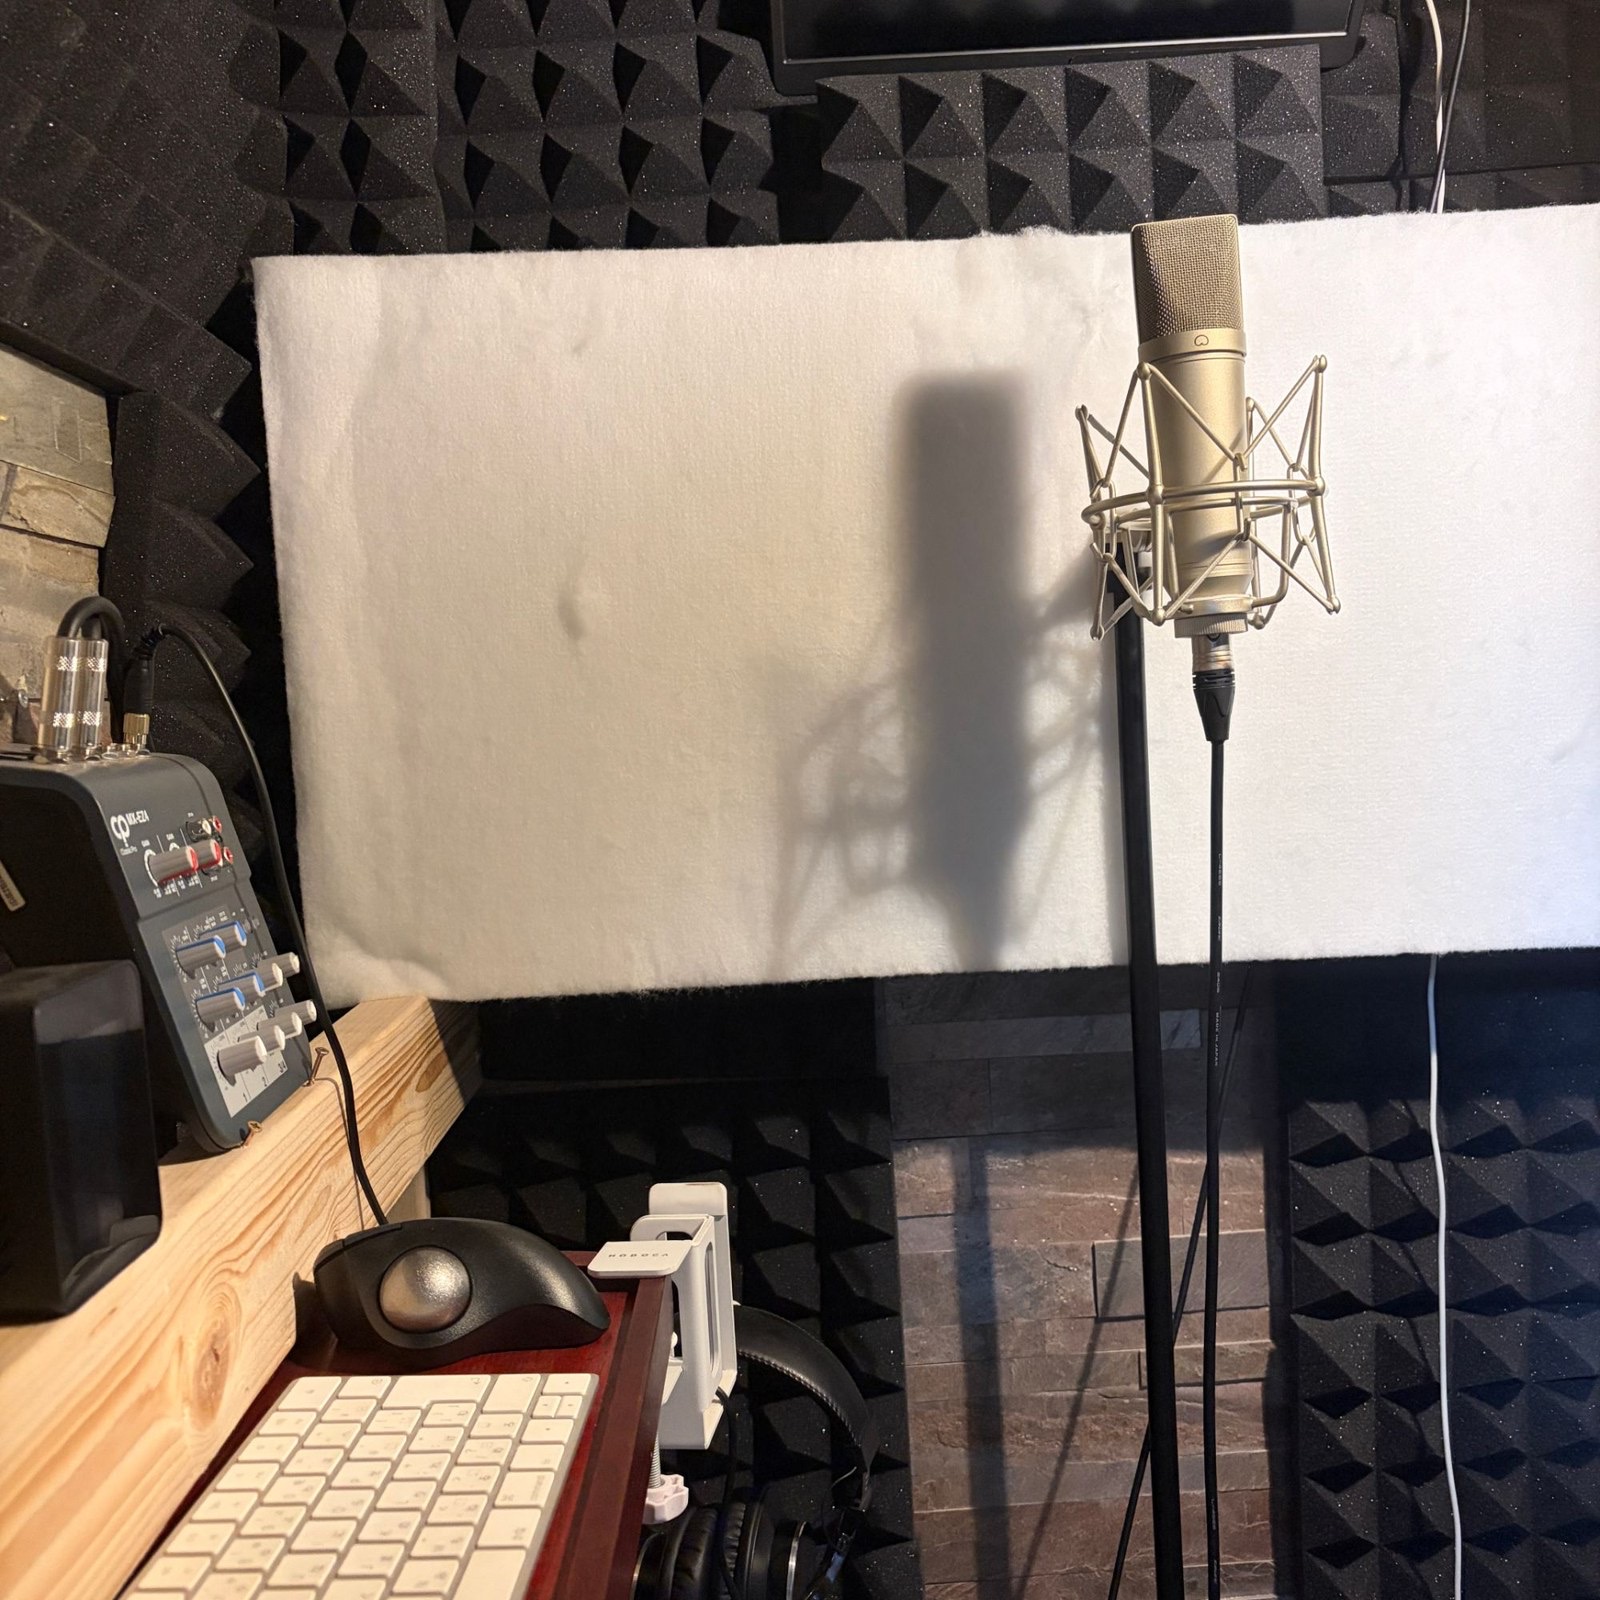
Using a corner lets you use two existing room walls. You only need to build two new walls.
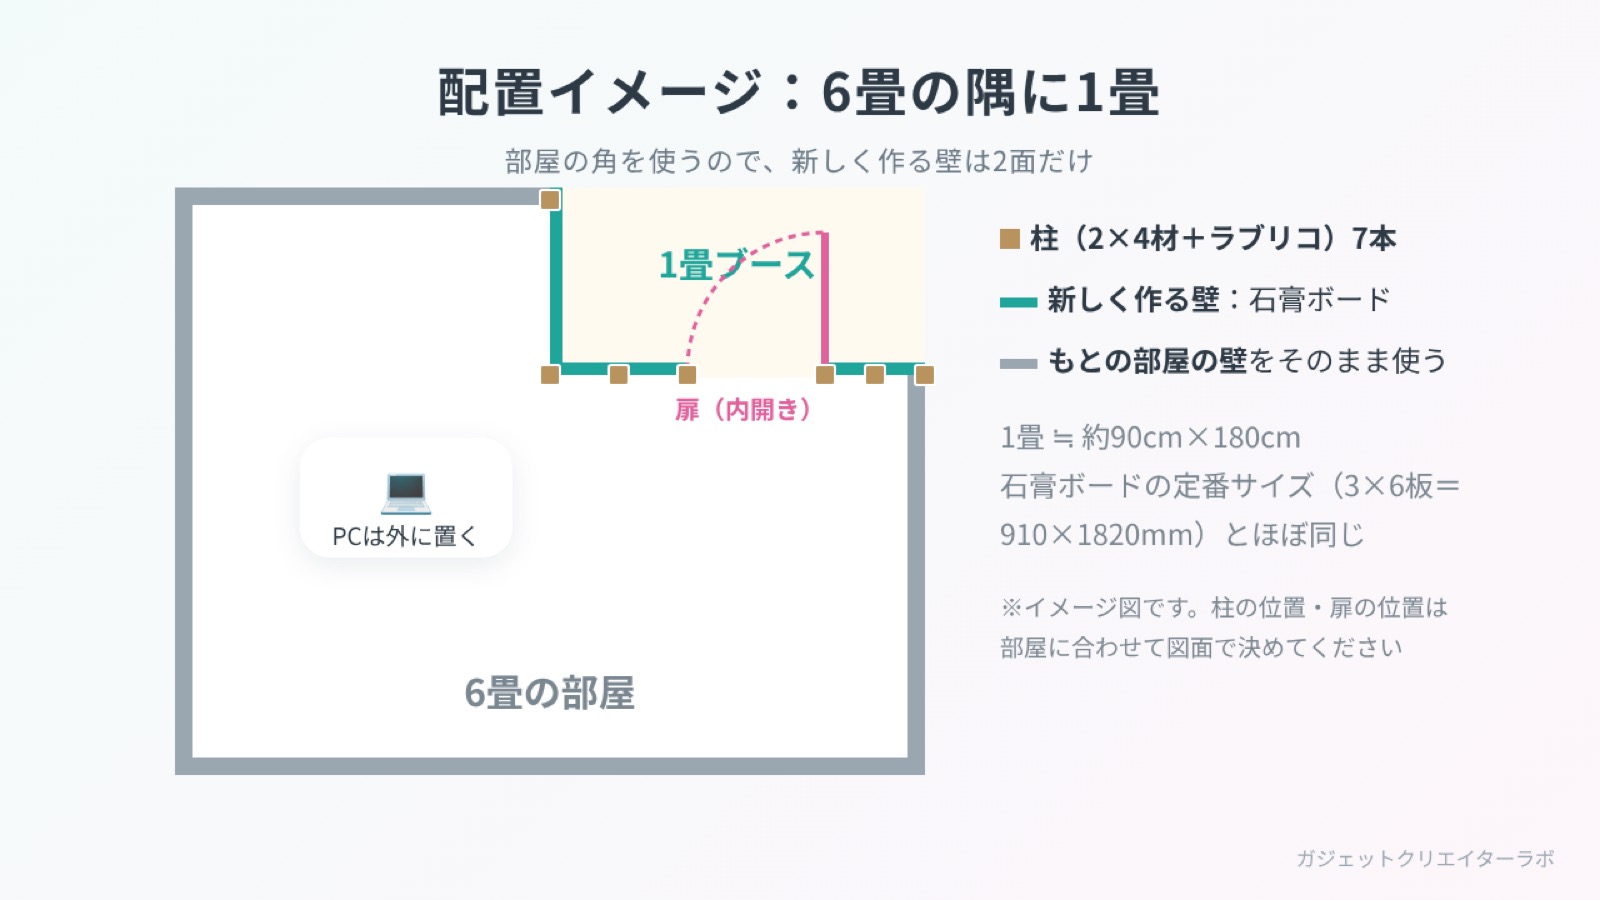
The drawing is only a layout concept. Choose the actual post and door positions to suit your room.
One tatami mat is roughly 900 × 1,800 mm (35.4 × 70.9 in). A standard drywall sheet in Japan, known as a “3 × 6” sheet, is 910 × 1,820 mm (35.8 × 71.7 in), almost the same size as one tatami mat. Thinking of it as “one tatami = about one sheet” makes it much easier to estimate materials.
Here is the basic frame of my booth:
- Posts: 7 (2×4 lumber with LABRICO adjusters, wedged between floor and ceiling)
- Walls: 12 mm (0.47 in) drywall (screwed to the posts from the drywall side; mounting the sheets on the outside leaves the posts exposed inside, making interior work easier)
- Door: heavy plywood + soundproofing sheet (about the size of a toilet door, opening inward)
- Door handle: gremon handle (Shibutani airtight handle, EL-105-2)
- Interior: sound-absorbing material (polyurethane acoustic foam or felt-like panels)
- Computer: outside the booth (operated from inside with a wireless keyboard, mouse and secondary monitor)