What’s New in Fender Studio Pro 8.2? A Friendly Guide for Home Recording and Covers
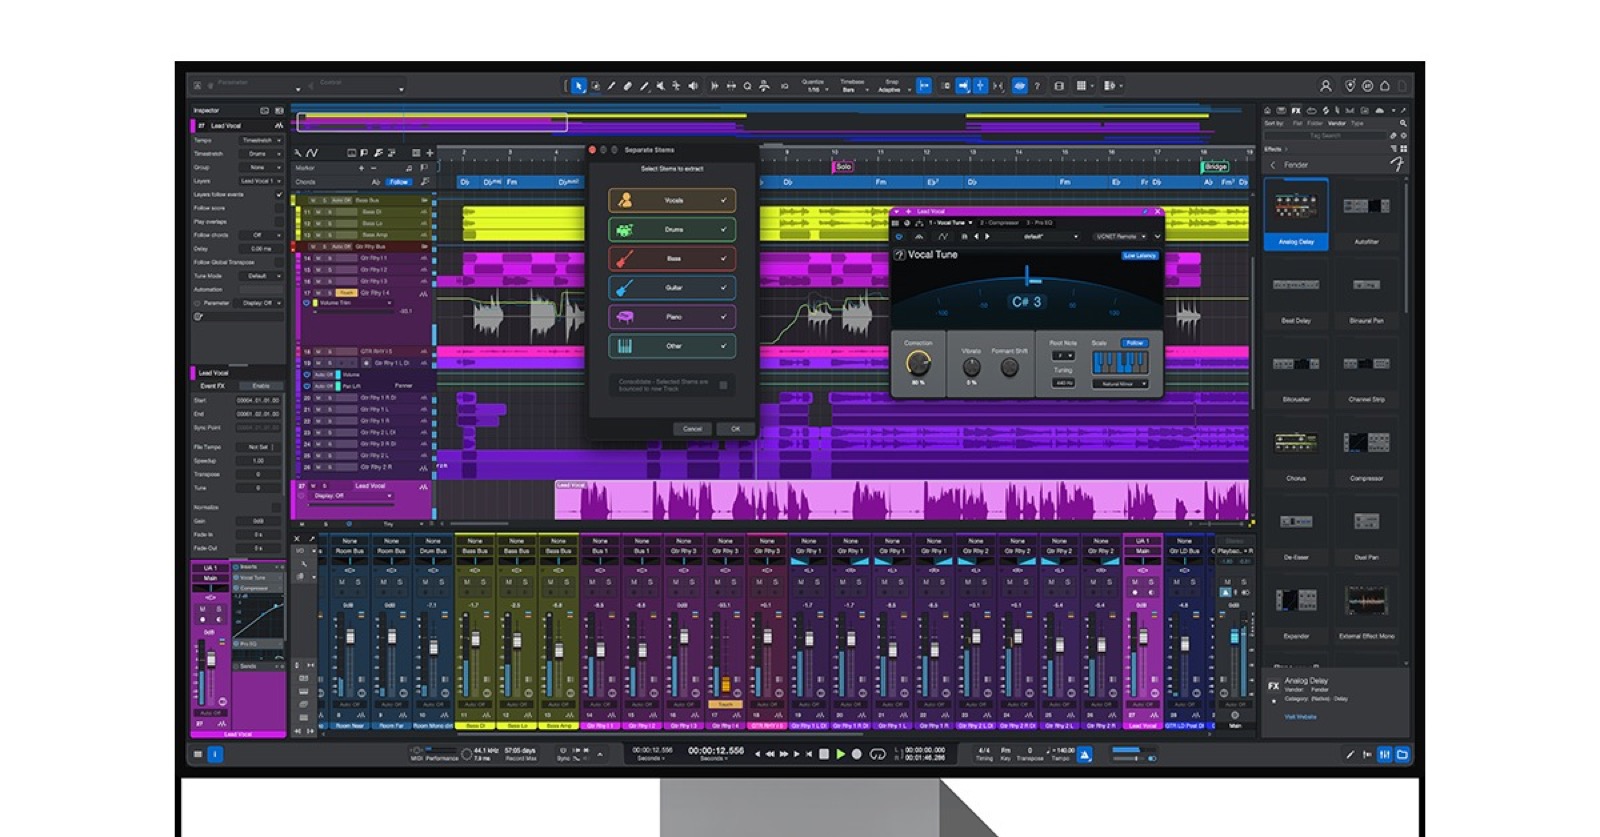
☕ A coffee-length story — an overview of the update and where it helps with home recording and cover-song production.
💡 What you’ll learn
- Nine features added or changed in version 8.2, and where they fit into your workflow
- Mixing tools that help when working with vocals and backing tracks
- Who can get the update, plus what beginners should consider
Fender Studio Pro 8.2 in a nutshell
Fender Studio Pro 8.2 makes it easier to revisit volume and solo settings, and to work with vocal and instrument parts. You can adjust levels without redrawing automation, keep some of the mix audible while soloing a channel, and extract guitar or piano parts with stem separation.
For cover-song mixes, many of the changes help at each step, from monitoring vocals while recording to editing and balancing levels. MIDI users also get per-note articulation switching and support for MIDI 2.0 data.
Let’s look at the features in an order that makes it easy to picture how they might fit into a home studio or a cover-song workflow.
Vocal Tune: Follow and Low Latency
Vocal Tune, the tool for correcting vocal pitch, now has two options: Follow and Low Latency.
Follow detects the key and scale of a song. It won’t change the key automatically, though. It’s a useful middle ground if you want to know the song’s key but choose the correction scale yourself. For songs with key changes, check which key you want to use for correction as you work.
Low Latency is a mode that keeps plug-in delay under 3 milliseconds. You can use it to hear your voice through Vocal Tune while recording. It’s a welcome improvement if you want pitch correction in your monitoring setup as well as in your post-recording edits.
For example, it can help make processing delay less noticeable as you sing and monitor your voice. You might use Low Latency while recording, then revisit the settings as needed during final editing.
Dim Solo Mode keeps the mix in the background
Dim Solo Mode has been added to the mixer. When you solo a channel, the other channels are turned down by an amount you choose instead of being silenced completely. Muted channels remain muted.
With conventional soloing, everything except the selected sound disappears. That makes it easier to hear details in isolation, but harder to judge how the sound sits against the backing. Dim Solo lets you focus on the selected channel while keeping the rest of the mix quietly audible.
When mixing a cover, this is handy if you want to check the pitch or tone of a harmony vocal while still hearing a little of the lead and backing track. It can also help when checking drums or bass while keeping a sense of their balance in the full song.
Trim Automation adjusts levels without erasing your moves
Trim Automation adds another layer of control to the volume of a channel or send. You can raise or lower the overall level without redrawing existing automation points. There’s no need to add a Mixtool plug-in or a VCA just to make an overall adjustment.
Automation records changes over time, such as raising the vocal in one section of a song. After fine-tuning those moves, you may still want to turn the whole track down a little. Trim Automation lets you adjust the overall level while preserving the detailed moves.
Say you’ve balanced the vocal phrase by phrase and now want to lower the entire vocal track by another 1 dB. You can shift the overall balance without selecting each point again. The same approach works when you want to adjust a send across the whole song.
Replace insert and send plug-ins from a menu
Plug-in Replacement lets you swap an effect on an insert or send for another plug-in from a right-click menu. Previously, you had to drag and drop to replace it.
An insert applies an effect directly to a track’s audio. A send routes some of that audio to another effect, such as a reverb shared by several tracks. You may want to swap plug-ins in either place while exploring different sounds.
If you want to compare another compressor on a vocal or a different reverb on a send, you can do it from the right-click menu. This makes the replacement step easier to follow while you experiment with effects.
Stem separation now extracts guitar and piano, too
Extended Stem Separation can now separate and extract guitar and piano. Stem separation splits a finished mix into parts such as vocals and instruments. Version 8.2 adds guitar and piano to the available parts.
You can use the extracted audio to replace a performance, transcribe audio to MIDI, or sample it. For instance, you could isolate a guitar part to follow its phrasing by ear, or use a piano sound as source material for a different arrangement.
When learning a song by ear, it’s easier to follow a phrase if you can focus on the instrument instead of hearing it buried under the rest of the arrangement. Whether you use the extracted audio directly or as a reference for playing or programming is up to your goal.
Separate time and bar markers across multiple marker tracks
Multiple Marker Tracks lets you add as many marker tracks as you like. Each one can use either a time-based or bars-and-beats reference.
Markers identify song sections or editing points. A time-based marker stays at a position in real time, while a bars-and-beats marker follows the song’s tempo and meter. You can keep markers for different purposes on separate tracks.
When scoring to video, you can place time-based markers at picture cues so they stay put if you change the song’s tempo. Markers for the song structure, such as the intro or chorus, can use bars and beats. Separating them by purpose makes it easier to find the markers you need while editing.
Assign sound variations to individual notes
Per Note Sound Variations lets you assign a sound variation to each note. Sound variations are instructions that switch articulations or other playing styles in an instrument. If you move a note, its assigned variation moves with it.
For example, if you want to use different articulations for individual notes in a programmed phrase, you can keep each note and its articulation assignment together. This can cut down on cleanup where you move a phrase but leave the articulation changes behind.
View MIDI 2.0 data in the Note Editor
With MIDI 2.0 support, Fender Studio Pro can receive higher-resolution velocity and controller data from compatible controllers and instruments. Velocity represents how hard a note is played; controller data includes values that change a sound or shape a performance.
You can view the received data in the Velocity, Aftertouch, and Part Automation lanes of the Note Editor. This is useful if you want to inspect performance details from compatible gear as MIDI data.
The supported operating systems are macOS and Linux. On Windows, this depends on official MIDI 2.0 support from Microsoft, available with Windows 11 25H2 and later. The features available to you depend on your operating system and equipment, so check that both are supported.
Freeze tracks with their effects
An update to Freeze lets you freeze a track or channel with its insert effects rendered into the audio. The channel’s volume and pan settings remain in place after freezing.
Freeze renders a track you’re editing to audio and commits its processing. Including effects lets you keep your sound while moving ahead with the project. Since volume and pan are preserved, the channel retains its basic placement before and after the freeze.
This can help when you want to commit a track with insert effects and continue working on the project. If you want to change the sound later, check how the frozen track is handled before editing.
How to get the update and who it’s for
Fender Studio Pro 8.2 is available to owners of eligible perpetual licenses and Fender Studio Pro+ members.
Eligibility depends on your license or membership. Check your Fender account for the latest version available to you before installing it.
Fender Studio Pro — official product page
Getting started with home recording
If you’re starting a home studio, you’ll need more than a DAW. You’ll also need an audio interface to bring audio from a microphone or guitar into your computer. Fender’s Quantum series offers a few different ways to get started with Fender Studio Pro.
Fender Quantum LT2
The Fender Quantum LT2 is a 2-in/2-out USB-C audio interface. Registering the unit includes a six-month trial of Fender Studio Pro. You can control the direct-monitor mix from Fender Studio Pro, which is useful if you want to manage your recording monitor setup from the same place. This can make it easier to keep the software and monitoring workflow together while you record.
Quantum Creator bundle
The Quantum Creator bundle includes a perpetual license for Fender Studio Pro. It’s an option for anyone who wants to start with a bundle that includes a permanent DAW license rather than a trial version. The two products offer different ways to begin, depending on whether a time-limited trial or a perpetual license better fits your plans.
In summary
Fender Studio Pro 8.2 updates practical parts of the workflow, including vocal monitoring while recording, checking sounds in solo, and adjusting levels after writing automation. Stem separation for guitar and piano, marker management, MIDI expression, and Freeze also expand what you can do, from cover-song production to broader music making.
Think about which parts of your own workflow would benefit most, and it’ll be easier to choose what to try after updating. If you record vocals, start with Vocal Tune’s Low Latency mode. For mixing, try Dim Solo Mode or Trim Automation. If you program MIDI, explore per-note sound variations and MIDI 2.0.
Photo credits
- Header image, Fender Studio Pro 8.2 — Fender newsroom: https://www.fender.com/newsroom/273556-fender-studio-pro-8-2-expands-mixing-and-creative-production-tools/