Rakuten Shopping Marathon — What to Add to a Home Studio First
📅 Archived post from October 23, 2026. Prices, dates and availability may have changed.
☕ A Gadget Creator Lab home-recording column. After your microphone and audio interface, what small essentials help support a better recording setup? They may not be glamorous, but they can reduce retakes and setup time. Let’s look at the tools that make a difference, in order of priority.
💡 Tip — What you’ll learn
- What to prioritize when adding to a home-recording setup
- What to look for when choosing small accessories
- What to check about connections and placement before you buy
What should you add after buying a microphone?
Once you have a microphone and audio interface, it’s easy to start eyeing a preamp or a more expensive mic. But if getting ready to record is where you’re running into trouble, first take another look at the accessories around them: cables, a stand, and a pop filter.
Maybe your cable is too short to move your chair. Maybe your stand wobbles, so the mic position changes every time. Maybe plosive bursts keep forcing you to record another take. Small inconveniences like these can break your concentration. Before adding new gear, write down one thing that gets in your way before or during a recording. That makes it easier to choose what to buy.
During the Rakuten Shopping Marathon, running from October 24 at 8:00 p.m. to October 27 at 9:59 a.m., shoppers who enter the campaign and buy from multiple shops earn a higher points multiplier based on the number of shops they use. That can suit a plan to find necessary small accessories at different shops, instead of buying one expensive piece of gear from a single store. Of course, there’s no reason to add things you don’t need just to increase your shop count. If you have several purchases in mind, listing candidates by item can help keep them organized.
A prioritized list of home-recording upgrades
Start with the things most likely to prevent a recording from stopping. Priorities will vary depending on what you already own and how you record.
- XLR cable — Reliable connections and easy routing. A good fit if your cable is too short or its connection seems unreliable. You can put it off if your current cable works without problems.
- Microphone stand — Repeatable mic placement and a comfortable posture. A good fit if you record handheld or with a makeshift stand. You can put it off if the included stand is stable.
- Pop filter — Helps tame plosives. A good fit for singing or voice-over. You can put it off if the mic’s built-in protection is doing the job.
- Headphone extension or adapter — More freedom of movement while monitoring. A good fit if the cable doesn’t reach or the plug doesn’t fit. You can put it off if your current connection is convenient.
- Acoustic foam or reflection filter — Helps reduce room reflections. A good fit if room sound is getting into your recordings. You can put it off if reflections aren’t bothering you.
- USB hub or power strip — Helps organize connections and power. A good fit if you’re short on ports or outlets. You can put it off if you have enough connections and power.
1. XLR cable: start by making the connection reliable
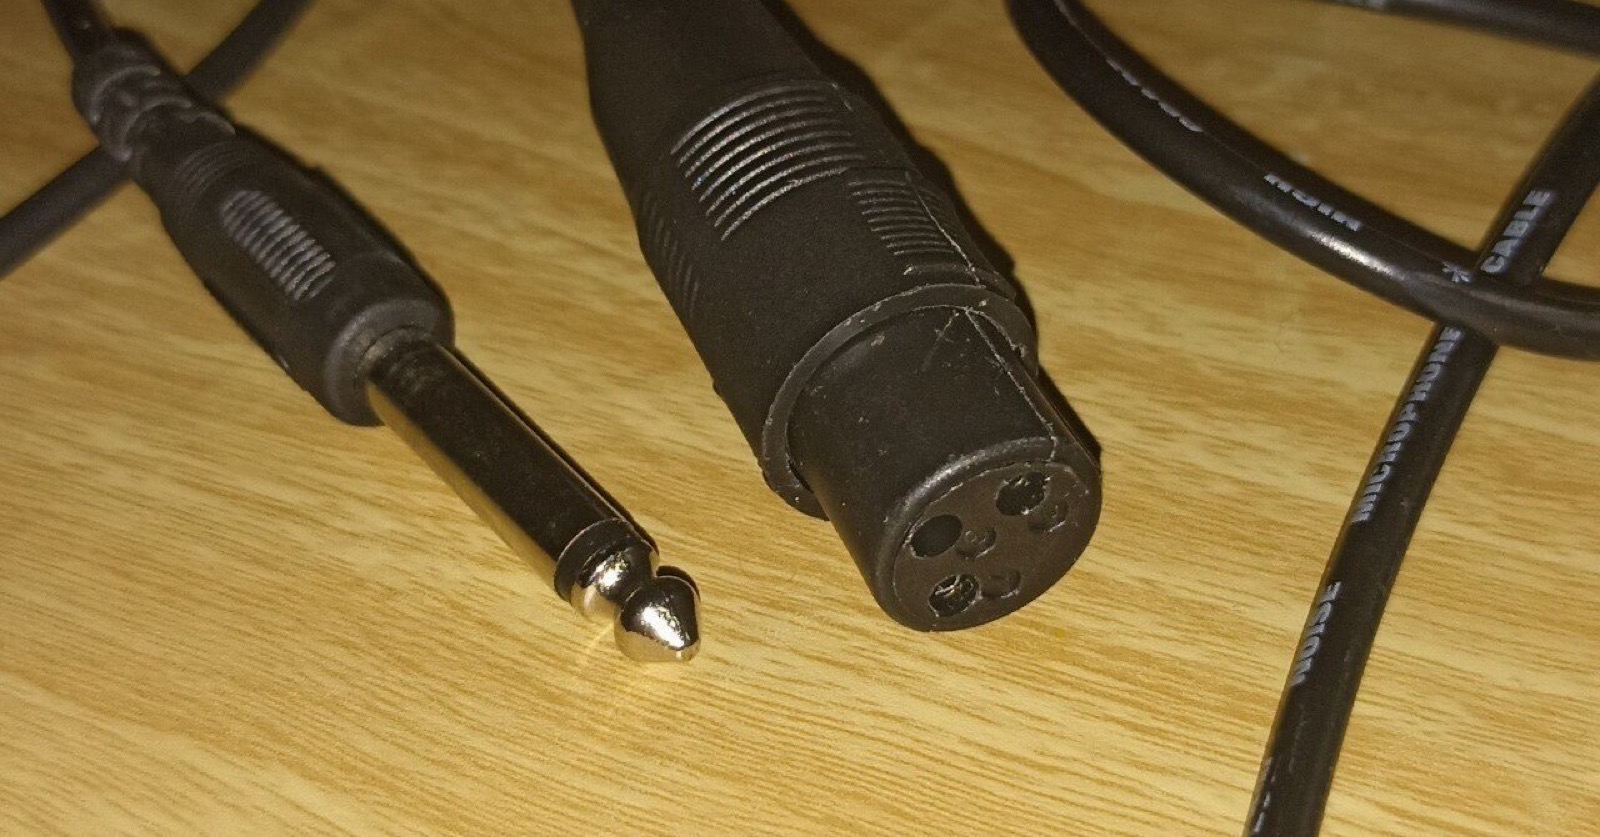
A cable isn’t magic gear that dramatically transforms your sound. But if the mic connection is unreliable, recording itself can come to a halt. Established cable brands such as CANARE and BELDEN are commonly used for microphones. Even when choosing a ready-made cable, check the connector type as well as the brand.
The key is getting the length you need. Measure the actual distance from the mic position to your interface, then leave a little slack. A cable that’s too long can tangle on the floor; one that’s too short limits where you can put your gear.
Very inexpensive cables can vary in connector build and contact quality. If you hear noise when the cable moves or the sound cuts out, check the connector itself as well as the cable. Rather than choosing on price alone, consider a reliable, established cable with the right connectors and length.
2. Microphone stand: keep the mic in position
A stand makes it easier to keep your singing posture and distance from the mic consistent from one take to the next. Options include desk-mounted arms and floor-standing boom stands. The most convenient shape depends on whether you stream or sing seated, or record while playing an instrument. When looking at stands from brands such as K&M, decide first where it will sit and how far it needs to move.
The key is stability with the microphone mounted. Account for the weight of the microphone and accessories such as a shock mount, then check the stand’s capacity and construction. The farther a boom extends, the more its center of gravity shifts outward. A lightweight stand may sag at the end or tip over. If the product listing doesn’t specify a weight limit, ask the retailer about using it with a heavier microphone.
3. Pop filter: soften plosive bursts
Strong bursts of air from sounds like “p” and “b” can hit the microphone and show up in a recording as low thumps. A pop filter sits in front of the mic to catch that airflow. It can also serve as a marker that helps keep your mouth from getting too close while recording.
The key is whether it attaches to your stand. Check whether the gooseneck clip fits the pole and whether there’s room to mount it. Pop filters come in many forms, including mesh screens and metal plates. Start with one that attaches securely and lets you adjust the distance from the mic.
Even with a pop filter, plosives can remain if you blow directly into the front of the microphone. Adjusting the direction of your mouth or your distance from the mic can help, too. Listen to a test recording and find the position that works for you.
4. Headphone extension or adapter: get more room to move while monitoring
When your headphone cable doesn’t reach during a recording, it gets in the way whenever you change your posture or move your gear. An extension lets you monitor from farther away from the interface. An adapter is useful when the plug size on your headphones doesn’t match the equipment.
The key is the connector type and size. Check your gear’s specifications so you don’t confuse 3.5 mm with 6.3 mm, or stereo with mono. One cable in the length you need is usually easier to manage than connecting several extensions together.
5. Acoustic foam or reflection filter: consider these if room reflections bother you
When room sound gets into a recording, a voice can seem distant, or the reverberation may remain noticeable even after processing. Acoustic treatment is used to reduce reflections from walls and around the room. A reflection filter sits behind or around a microphone to help reduce nearby reflections. Neither one completely removes the sound of the whole room.
The key is the location and size. Check whether it can be mounted on a wall or placed on a desk, and whether it will interfere with the microphone or stand. If you’re unsure whether room sound is the problem, listen to a vocal recording and check the room’s response by clapping and noting how close you are to the walls before deciding.
6. USB hub or power strip: wait until you actually run short
Once USB devices and power plugs make your desk feel crowded, tools for organizing cables can be handy. But adding a hub doesn’t guarantee a more stable connection. For equipment where power or connection stability matters, such as an audio interface, follow the manufacturer’s connection guidance.
The key is the number of ports you need and the connection standard. Check that a USB hub’s standard matches your computer and peripherals, and whether devices that need extra power require a powered hub. When choosing a power strip, look beyond the number of outlets to its placement and the direction of the cord.
Common mistakes when adding gear
One common mistake is focusing on specs or appearance first and leaving connection and placement requirements until later. Check cable length and connectors, stand weight capacity and placement, and the diameter and stereo or mono type of adapter plugs. A stand can tip if its boom is extended too far while holding a microphone.
Adding more acoustic treatment doesn’t always make a recording sound more natural. If you reduce room reflections too much, the way a voice sounds in the room can change. First identify the problem in your recording, then address it one thing at a time. Don’t choose a USB hub by port count alone, either; check compatibility with the devices you’ll connect, including your interface.
The point isn’t to buy more just because there’s a shopping marathon. Make sure the thing you’re dealing with now is something the purchase will actually solve. If you’re shopping at different stores, compare shipping and return terms along with connector compatibility.
In short: a checklist before you order
- I’ve identified one problem I’m having with recording.
- I’ve checked the length and connectors on my XLR cable.
- I’ve checked the stand’s placement, boom length, and the microphone’s weight.
- I’ve checked how the pop filter attaches.
- I’ve checked my headphones’ plug size and whether the connection is stereo or mono.
- I’ll choose acoustic treatment after checking the placement and room reflections.
- I’ve checked the number of ports and standards I need for a USB hub or power strip.
- I’ll order only what I need, after checking each shop’s shipping and return terms.
If you’re unsure what to buy first, start with a cable if the connection feels unreliable, a stand if the mic position keeps shifting, or a pop filter if plosives are bothering you. Solving one recording problem with the right tool can make the next upgrade easier to spot.
Photo credits
- Header image, “XLR Cable.png” by BRONSKIARCHIVE (cropped) / Wikimedia Commons / CC BY-SA 4.0
- “Tripod microphone stand.jpg” by Bubba73 (Jud McCranie) / Wikimedia Commons / CC BY-SA 3.0
- “Pop filter.jpg” by midiman / Wikimedia Commons / CC BY 2.0
Licenses:
- CC BY 2.0: https://creativecommons.org/licenses/by/2.0/
- CC BY-SA 3.0: https://creativecommons.org/licenses/by-sa/3.0/
- CC BY-SA 4.0: https://creativecommons.org/licenses/by-sa/4.0/