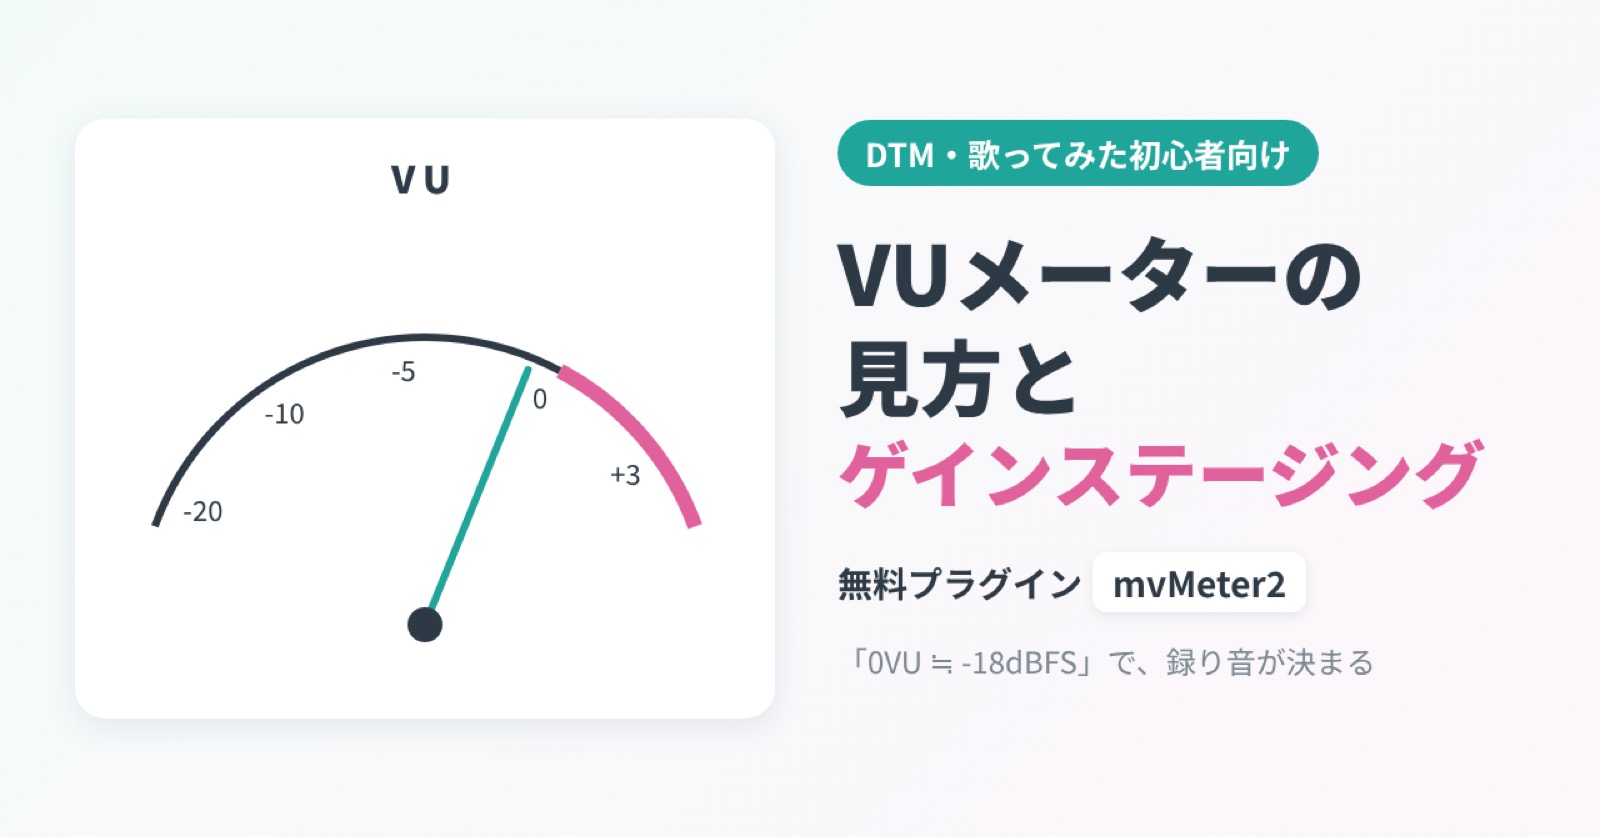
How to Read a VU Meter and Set Gain — Set Recording Levels with the Free mvMeter2 Plugin
🎚️ What you'll learn
- How a DAW peak meter differs from a VU meter
- Why “0” VU corresponds to “-18 dBFS” in digital audio
- How to set recording levels when tracking vocals (four steps)
- Gain staging as a “relay race for audio”
- Why to match levels before and after a plugin
- Where to get and how to use the free VU meter mvMeter2
Afraid of the red light? Are you recording too quietly?
Have you ever stared at the meters on your screen while recording vocals in a DAW?
You push your voice in the chorus and the green bar shoots up, its tip glowing red. “Whoa, did I clip?” You panic and turn the knob down. Now it’s too quiet, and when you listen back, the vocal sounds lifeless.
Should you turn it up or down? There seems to be no clear answer to what the “right level” is.
Many people starting out with home recording or cover vocals get stuck here.
Hi, I work in audio and write columns on note. When someone is starting to record cover vocals, I tell them that the first plugin to install should be a VU meter—not an effect or pitch correction.
In this article, I’ll explain how to read a VU meter and the idea of “gain staging” as simply as I can. We’ll use mvMeter2, a free VU meter plugin.
A DAW meter and a VU meter show you different things
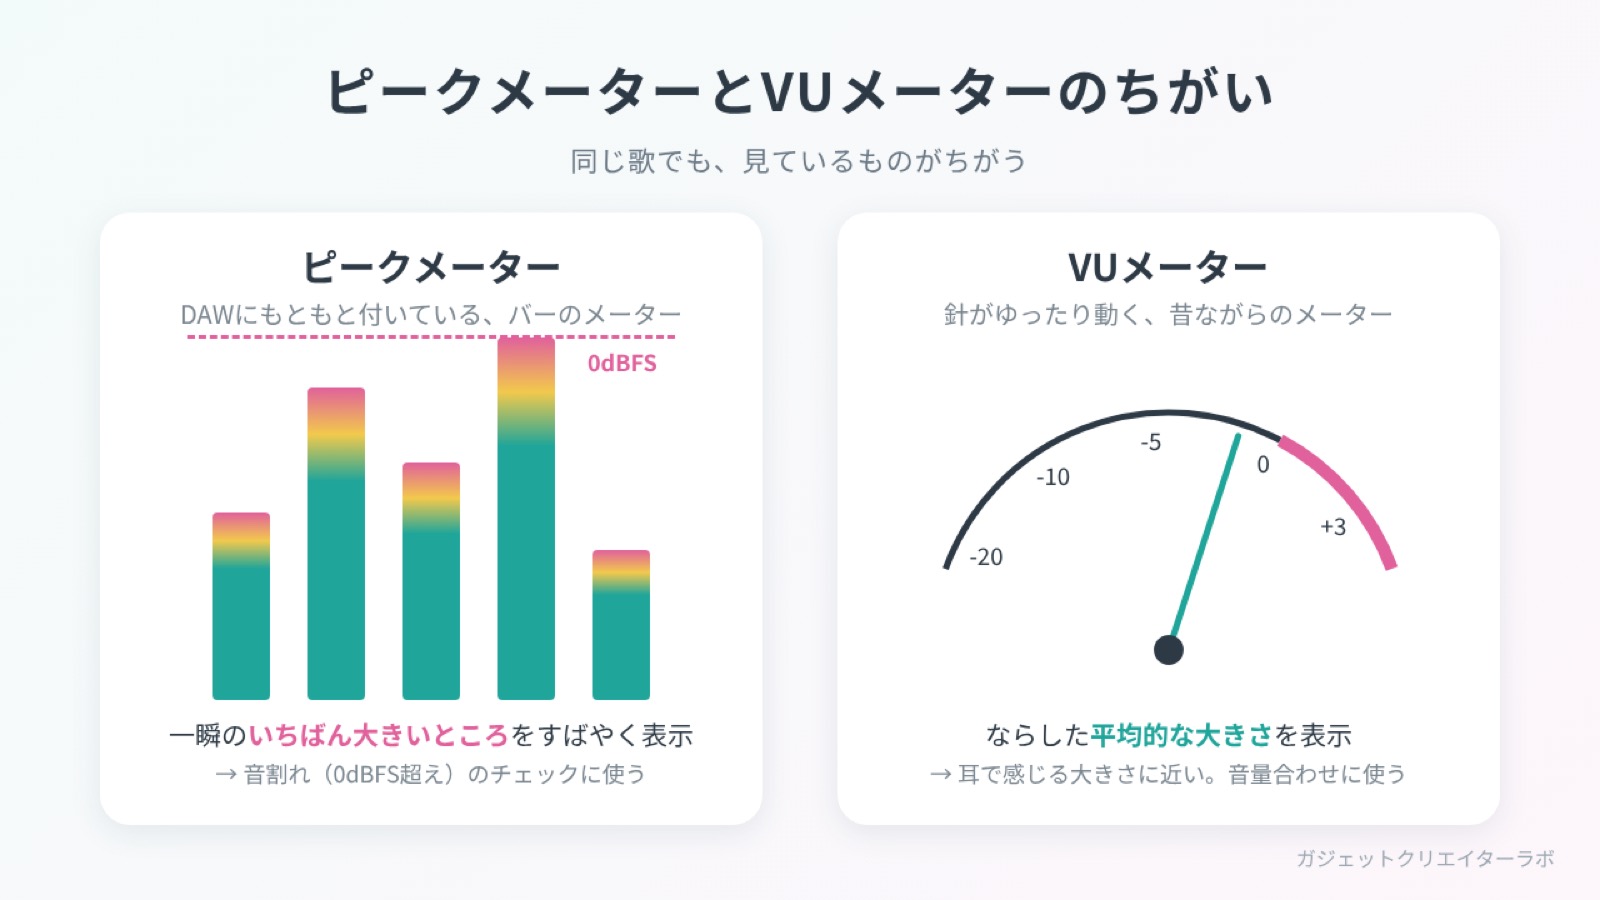
A DAW comes with level meters built in: the bars beside tracks that jump up and down.
Most are peak meters.
Peak meters: the loudest instant
A peak meter quickly and accurately displays the highest point of the audio waveform. Watching to make sure the signal doesn’t hit the digital ceiling is what it does best.
But a peak is a value at a single instant. Even a short sound, like a sharp consonant or the attack of a breath, can make the bar jump. That’s why the loudness you hear often doesn’t line up with what you see on a peak meter alone.
VU meters: the smoothed, average level
A VU meter is the kind of meter with a gently swaying needle found on older recording equipment.
The needle is deliberately made to move slowly. It doesn’t overreact to instant peaks; it shows the level averaged over a stretch of time. That’s much closer to how our ears perceive loudness.
In other words:
- Is the signal clipping? Check the peak meter.
- Is the level about right? Check the VU meter.
The trick is to use each meter for its own job.
“0” VU is “-18 dBFS” in digital audio
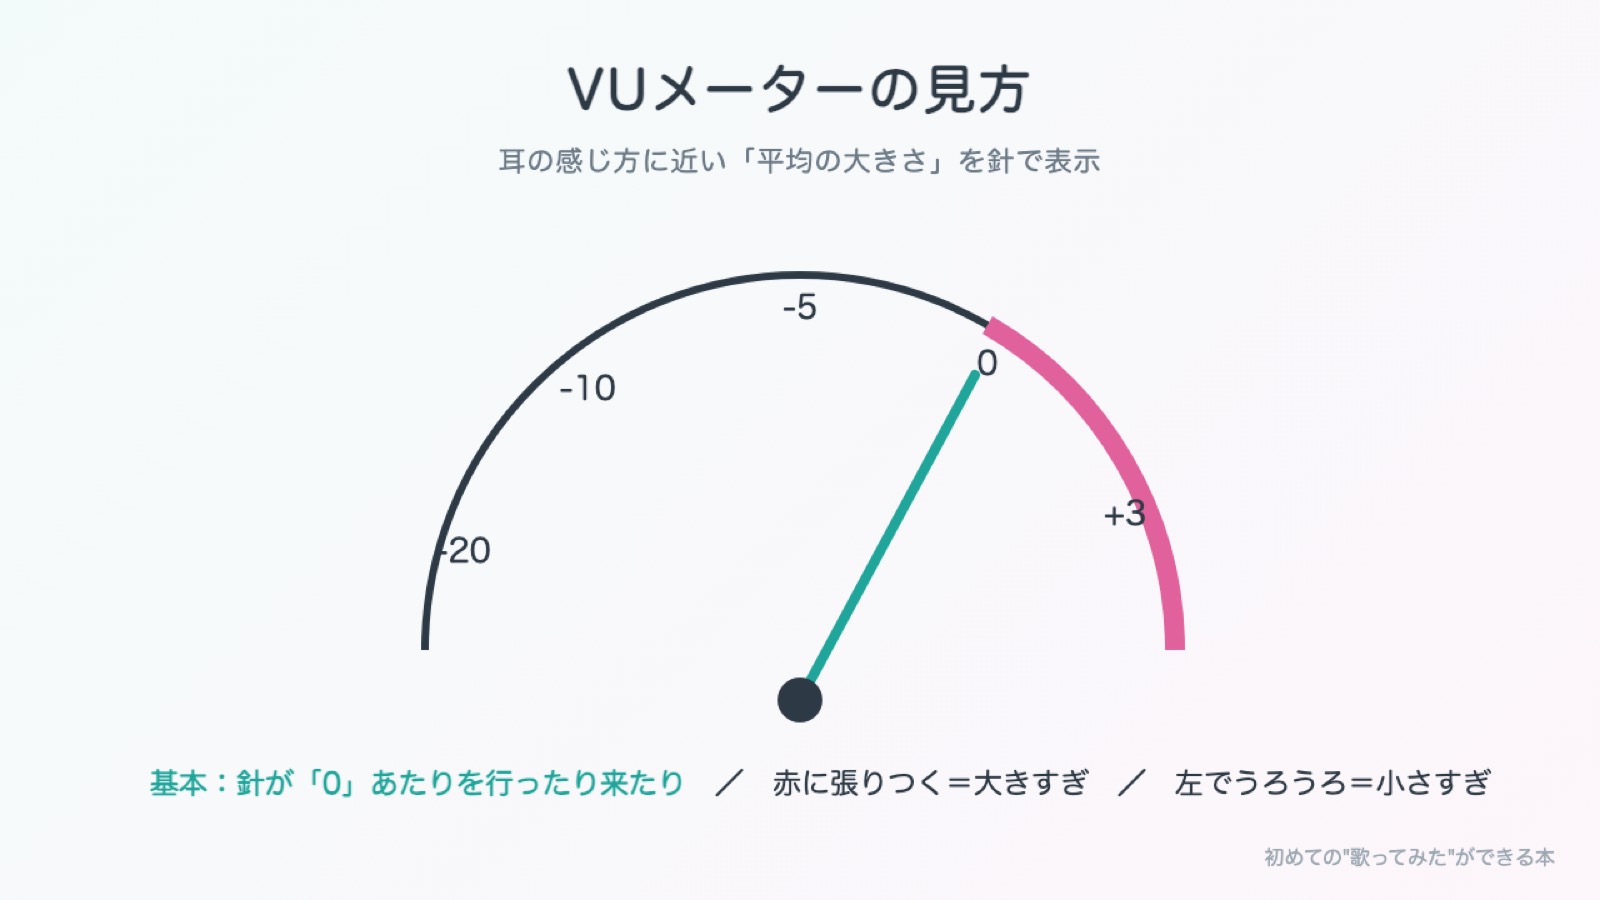
VU meter scales usually run from around “-20” to “+3,” with “0” toward the right.
Here’s a point that trips a lot of people up:
“0 VU” and “0” on a DAW meter (0 dBFS) are different things.
0 dBFS is the ceiling
Digital recording has a ceiling beyond which it can’t record any higher. That’s “0 dBFS.” If a voice hits the ceiling, the waveform gets cut off at the top, creating harsh distortion known as clipping.

Once the audio clips, you can’t restore it to its original form later. That’s why it’s important not to get too close to the ceiling.
0 VU is 18 dB below the ceiling
Many VU meter plugins are set by default to display “-18 dBFS” as “0 VU.” The official mvMeter2 manual also sets -18 dBFS as the default reference level in VU mode.

What does that mean?
If you record with the VU needle hovering around “0,” the average level will be around -18 dBFS, leaving about 18 dB of headroom before the ceiling.
Vocals often have brief peaks that jump well above their average level. With 18 dB of headroom, those jumps are less likely to hit the ceiling. Using 0 VU as your guide naturally gives you a safe, practical recording level.
You don’t need to memorize “-18” right now. Start with this: “Aim for 0 VU to stay safe.”
Setting your level while recording: four steps
Here’s how to set your level when you’re ready to record vocals.
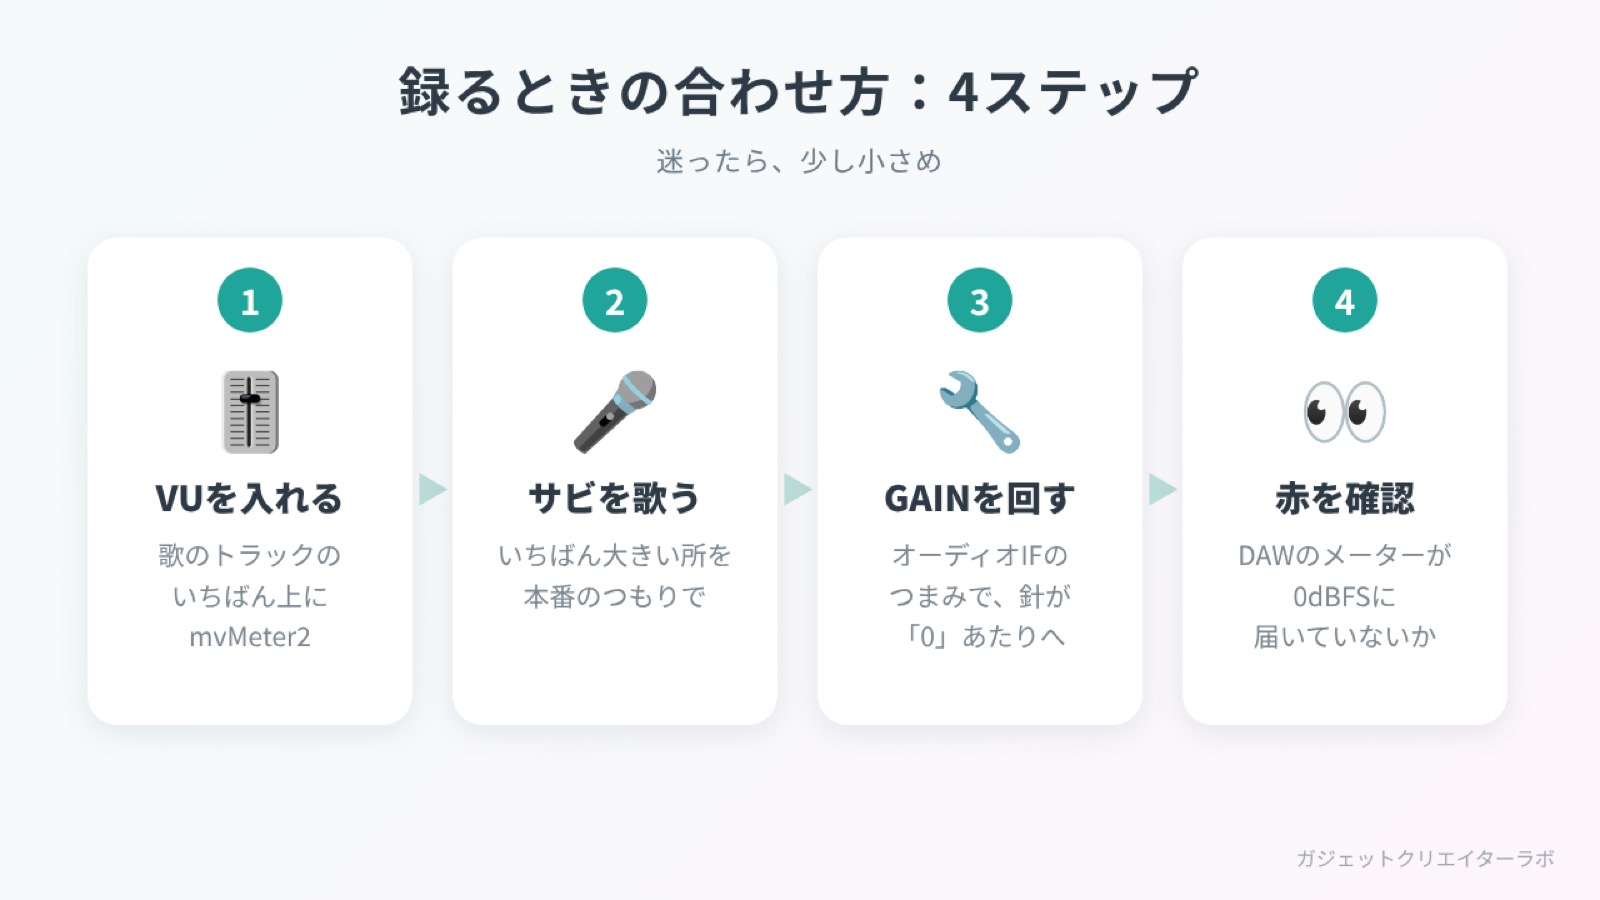
- Insert a VU meter plugin on your vocal track.
- Sing the loudest part of the song—usually the chorus—as if you were recording a real take.
- Turn the GAIN knob on your audio interface until the needle moves around “0.”
- Check that the DAW peak meter is not reaching the ceiling (0 dBFS).
Set the level at the loudest part. If you set it during a quiet verse, the level can shoot up in the chorus and hit the ceiling.
Adjust the GAIN (input knob) on your audio interface, not the DAW fader. The fader changes how loudly you hear the recorded track; it doesn’t change the level being recorded.
💡 If you’re unsure, record a little quieter
Modern audio interfaces and DAWs perform well, so recording a little quieter rarely makes noise a problem. Clipping is much harder to deal with. When in doubt, record a little quieter.
Gain staging: a relay race for audio
Once you’ve set your recording level, the next step is gain staging.
It sounds technical, but the idea is simple: keep the level in a healthy range at each point along the signal path.

Your voice gets passed along inside the computer like this:
- From the microphone to the audio interface (input gain)
- To the recorded track
- Through the plugins on the track (first, second, and so on)
- To a BUS that combines several tracks
- Finally, to the master, where everything comes together
In a relay race, if one runner drops the baton, no matter how fast the next runner is, they can’t make up for it. Audio works the same way: if the level is too loud or too quiet at any point, everything downstream is affected.
So, each time you pass the baton, check that the VU meter is around “0.” That’s the basic idea behind gain staging.
Why match levels before and after a plugin?
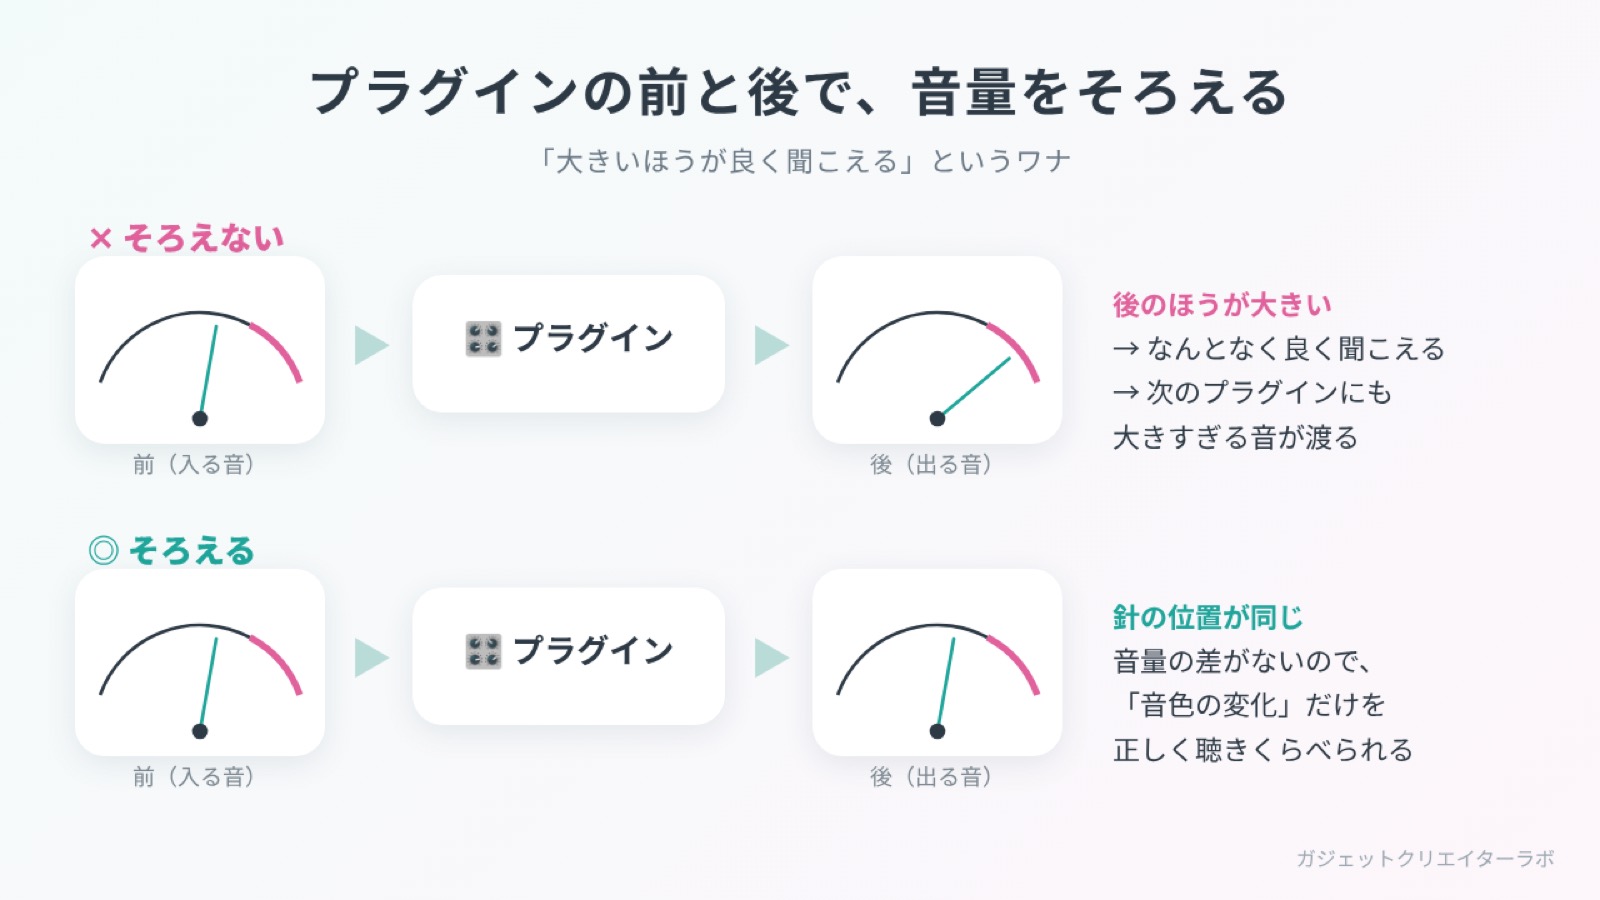
One especially important part of gain staging is matching the level before and after a plugin.
Reason 1: the “louder sounds better” trap
Our ears have a small bias: when two sounds are otherwise the same, we tend to prefer the slightly louder one.
Say you add an EQ or compressor and the level gets a little louder. You might think, “Wow, that sounds better!” But maybe the tone didn’t improve—the sound simply got louder.
Adjust the plugin’s output (OUTPUT or GAIN) so the VU needle lands in the same place before and after, then compare. That lets you judge whether the tone itself really improved.
Reason 2: give the next plugin a healthy signal
The other reason is the relay race itself.
If the level creeps up each time it passes through a plugin, the plugins later in the chain receive a signal that’s too loud. Plugins that react to incoming level, such as compressors, may not behave as expected if their input is too hot.
Keep the needle around “0” after the first plugin, and after the second, too. Keeping the baton at a consistent weight makes mixing much more predictable.
A useful plugin layout
If you’re new to this, try this:
- Put one VU meter at the very beginning of the track to check the incoming signal.
- Put another VU meter at the very end of the track to check the outgoing signal.
After adjusting a plugin, check whether the last VU meter shows about the same level as the first. This simple habit helps you learn gain staging naturally.
Free VU meter: mvMeter2
VU meters are available as plugins. My recommendation is mvMeter2, a free plugin from the German company TBProAudio.
According to the official site:
- Price: Free
- Supported systems: Windows and Mac
- Formats: VST, VST3, AAX (AU is also available for Mac)
- Meter types: Switch between VU, PPM, RMS, EBU R128 (loudness), and more
- Reference level: Adjustable (the VU mode default is -18 dBFS)
Supported operating systems, formats, and versions may change. Check the official site for the latest information before downloading.
TBProAudio official mvMeter2 page
Always download it from the official site.
It’s easy to use
- Download and install the version for your computer from the official site.
- Open your DAW and check that “mvMeter2” appears in the plugin list. If it doesn’t, rescan your plugins in the DAW.
- Insert it on your vocal track and make sure the meter type is set to VU.
- To start, leave the reference level at its default (-18 dBFS).
There are plenty of features, but at first it’s enough to use VU mode and see whether the needle is around 0.
In summary
- A DAW peak meter shows the maximum level at a single instant; a VU meter shows the average level.
- Many VU plugins map -18 dBFS to about 0 VU. Aim for 0 VU to leave headroom before the ceiling.
- When recording, sing the chorus and use the GAIN control on your audio interface to get the needle moving around 0.
- Audio passes from track to plugin to BUS to master. Keep the level healthy each time you pass the baton.
- Matching levels before and after a plugin helps you avoid the “louder sounds better” trap.
- The free mvMeter2 is a great first VU meter.
References
- TBProAudio official site: mvMeter2 product page, download page, and mvMeter2 Manual
About the illustrations
- Diagrams: created by the author
Photo credits
- Header image, illustration created by the author