Warm Audio WA76 Calibration, Step by Step — With Real Photos, Using Just a Multimeter
🎯 Who this guide is for
・Your WA76's meter or compression feels off, and you want to find the cause yourself before sending it in for repair
・You bought (or are about to buy) a used WA76 and want to be able to check its calibration yourself
・You own a multimeter but have never adjusted the inside of analog gear before
Introduction
The Warm Audio WA76 is a great piece of gear that puts a 1176-style FET compressor within reach at a reasonable price.
However, after years of use, or when you buy one secondhand, you may run into symptoms like these:
- The GR meter doesn't sit at 0 even with the compressor off
- In +4 / +8 mode, the meter doesn't match the actual output level
- The compression feels shallower or less natural than before
Why does the calibration drift?
Analog gear like the WA76 slowly drifts out of calibration as it's used. There are three main causes:
- Component aging: Parts like resistors, capacitors and FETs gradually change their characteristics over years of use. Capacitors in particular tend to degrade over time.
- Shock during transport: Vibration and impacts while carrying the unit to gigs or remote recording sessions can turn the trimmers on the board ever so slightly.
- Heat: Long sessions in a rack heat up the inside of the unit, and the temperature change in the components can shift the operating point.
The WA76's internal settings are very sensitive, so even these small changes show up clearly in the meter readings and in how the compressor behaves.
Most of this drift can be fixed by calibrating the internal trimmers.
In this article, I walk through the calibration procedure I actually use on my own WA76, with real photos of the circuit board and the exact trimmer locations.
No special test equipment is needed — a signal source (1kHz sine wave) and a multimeter (one that can measure AC voltage) are all you need.
What you'll learn
- The location and role of the 3 trimmers used for calibration
- A quick reference chart of dBu vs. multimeter voltage (V AC) — set everything by the numbers, no guesswork
- All 7 steps, from Q bias → meter zero → +4/+8 → GR tracking check
- A "Procedure Summary" so you can check the whole job at a glance
- What not to do, and the common pitfalls
Who this is for
- WA76 owners who feel something is off with the meter or the compression
- Anyone who has bought, or is thinking of buying, a used WA76
- Anyone curious about the inner workings of 1176-style compressors
About the WA76 in this article (original model)
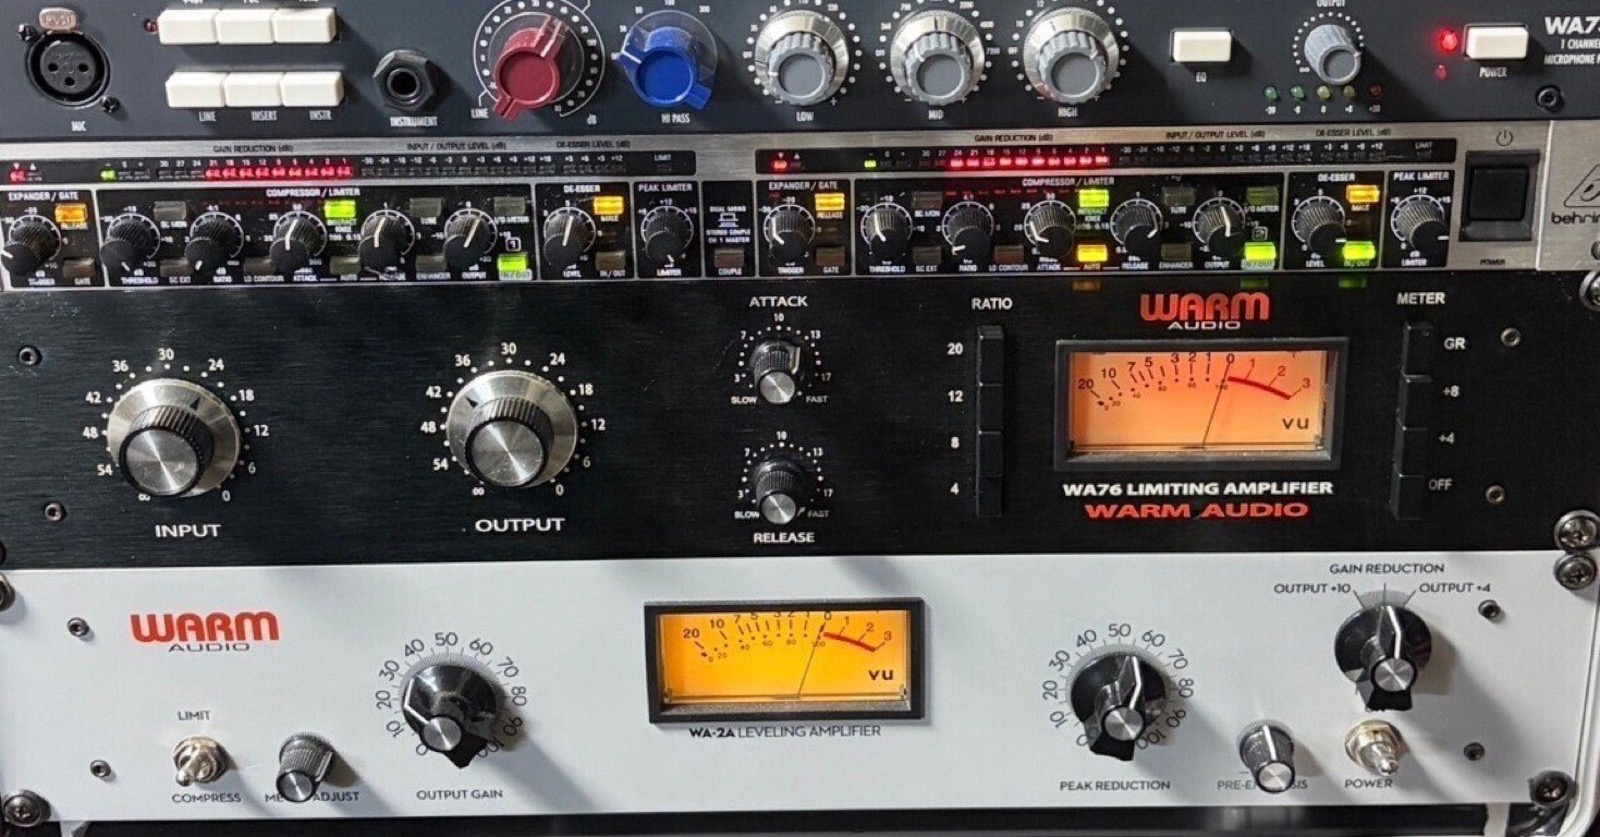
This article covers the black-panel WA76 shown in the photo.
In 2024 Warm Audio overhauled the series. The current lineup is the Rev D–based "WA76-D", the Blue Stripe–based "WA76-A", and their 2-channel versions (WA76-D2 / WA76-A2). That makes the WA76 in this article the "original model".
The new models add a lot of modern features: stereo linking, a blend knob for parallel compression, external sidechain, a sidechain high-pass filter, selectable input impedance, and more.
They're much more convenient, but the front panel has moved away from the traditional 1176 look, and honestly, I miss it a little.
I feel the original WA76, which keeps the simple, classic 1176 look, still has a charm nothing else can replace.
The WA76: "a modern 1176"
Compared with a vintage 1176, the WA76 is a very modern build.
Looking at the board, every resistor is a metal film resistor.
Its tone does differ from the vintage units, but in exchange it's stable with little unit-to-unit variation, and I think it's the perfect unit for recreating the 1176 as modern outboard gear.
No need to fear buying used
Now that it's the "original model", you see more WA76s on the used market.
The biggest worry with a used unit is calibration drift — "the meter is off" or "the compression behaves strangely" — but with the procedure in this article, you can bring it back to its proper state yourself.
Once you know how to calibrate it, there's nothing to fear about a used WA76.
Picking up a good unit at a reasonable price and finishing it off yourself — that's one of the joys of the simple, straightforward original WA76.
⚠️ Please read before you start
- The WA76's internal settings are very sensitive. In my experience, the factory settings on a new unit are usually very close to perfect. If there's no problem or anything that feels off, please don't touch the trimmers just out of curiosity. Once you move one, you'll have to redo the whole calibration from the beginning to get it back.
- This work is done with the case open and the power on. The power supply section (around the transformer and smoothing capacitors) carries high voltage, so be very careful to avoid electric shock.
- Opening the top cover may void the manufacturer's warranty.
- This article is written as accurately as possible based on work on an actual unit, but due to unit-to-unit variation and differences in production period, it does not guarantee the same results on every WA76.
- Except in cases of willful misconduct or gross negligence on the author's part, the author cannot accept responsibility for any damage or accidents resulting from this work. Please proceed at your own discretion and risk.
- If you're not confident, we recommend asking a professional repair technician.
What you'll need
- 1kHz sine wave source: A DAW test tone, an oscillator app, etc. is fine. It must be able to output 0dBu (0.775V)
- Multimeter (digital multimeter): Use the AC voltage range. It must measure 1kHz accurately (see the note below)
- Precision screwdriver (flathead): For adjusting the trimmers. A ceramic / plastic trimming tool is ideal
- Phillips screwdriver: For removing the top cover
- Cables: An XLR cable (for measuring the WA76's output), and a cable from your interface output to the WA76 input (if your interface has 1/4" outputs, a TRS 1/4" → male XLR cable)
- Test leads with alligator clips (nice to have): They free up both hands, so you can read the value while turning a trimmer
💡 A note on choosing a multimeter
Some inexpensive multimeters are designed to measure AC voltage at mains frequency (50/60Hz) only, and won't give accurate readings at 1kHz.
Check that the "AC voltage frequency range" in the spec sheet includes 1kHz.
Multimeter setup and basics
Multimeter settings
- Set it to AC voltage (V~ / ACV) mode — not DC voltage (V⎓).
- Use auto range. If there's no auto range, choose a range above 2V, such as 20V (you'll be measuring up to 2.75V).
- Test leads with alligator clips are handy. They free up both hands, so you can read the value while turning a trimmer.
XLR pin numbers
- XLR pins are Pin 1 = ground, Pin 2 = hot (+), Pin 3 = cold (−).
- The numbers are printed in small type on the face of the connector.
0dBu and the DAW's "0dB" are not the same thing
- All reference values in this article are in dBu (a unit of voltage). 0dBu = 0.775V.
- "0dB" or "-18dB" on your DAW's meter is not the same as 0dBu. How many volts it corresponds to depends on your audio interface.
- That's why we don't rely on the DAW's readout — we measure the actual voltage with the multimeter and set levels by that.
Inside the unit
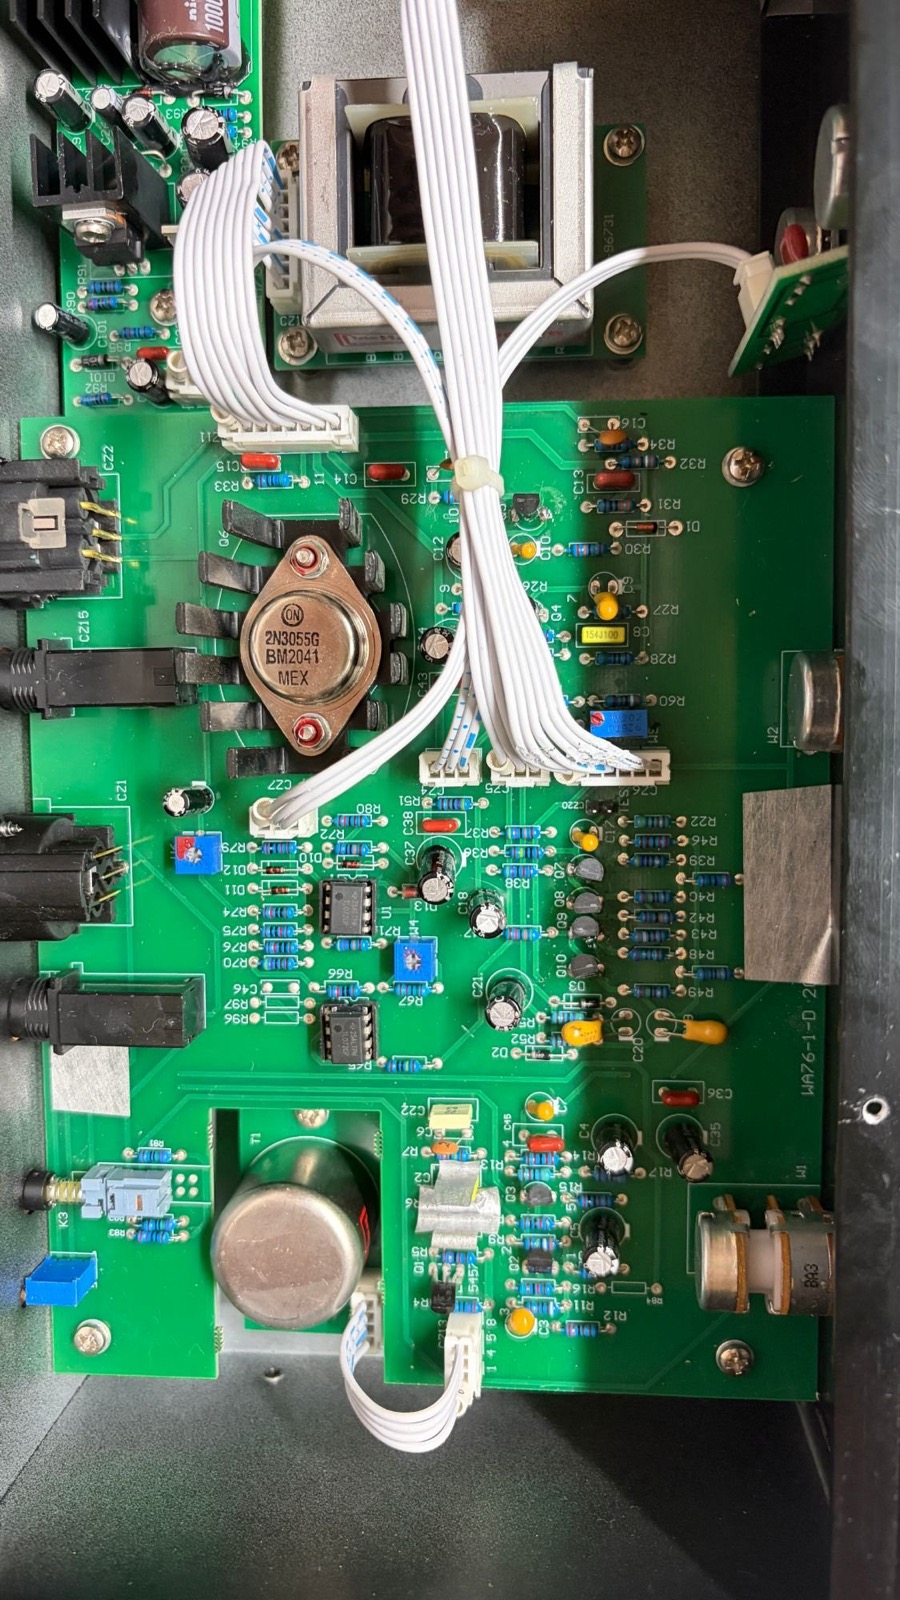
With the top cover removed, you'll see the main board like this.
Use the large metal-can transistor in the center (2N3055) as a landmark — it makes the trimmers much easier to find.
Now, let's walk through the calibration procedure.